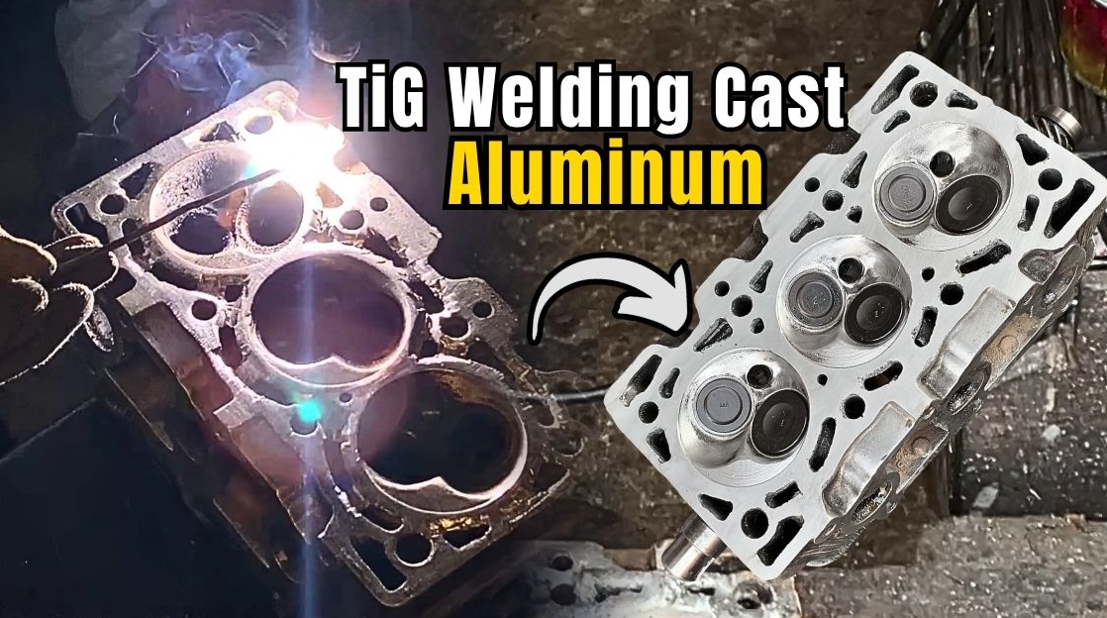
TIG Welding Cast Aluminum Engine Blocks & Transmissions
If you want to master TIG welding cast aluminum, you need to understand the right prep work,filler rods,and machine settings. A transmission housing, custom intake manifold, or engine block is a massive financial hit. Because cast aluminum is highly porous and undergoes constant thermal cycling, it absorbs deep-seated hydrocarbon contaminants—making it one of the most notoriously difficult metals for automotive machine shops to repair.
However, a structural failure does not mean the component is headed for the scrap bin. With industrial-grade metallurgical preparation, extreme decontamination, and precision AC TIG welding parameters, you can execute a permanent, high-tensile restoration.
In this professional fabrication masterclass from The Mechanic World, we break down the exact protocols for heavy-duty cast aluminum weld repairs.
Watch the complete structural repair process in our video masterclass below:

Heavy-Duty Equipment & Materials Required
Attempting structural cast aluminum repairs with entry-level or incorrect tooling will result in catastrophic weld porosity, cold lap, or secondary heat-affected zone (HAZ) cracking. Below are the top-selling, industry-standard tools required for this fabrication.
1. Industrial AC/DC TIG Welding Equipment & Consumables
PRIMEWELD TIG225X 225 Amp AC/DC TIG Welder: To penetrate the heavy aluminum oxide layer, you must utilize an AC (Alternating Current) TIG machine with advanced frequency and AC balance controls. This specific unit is a top-seller for providing industrial arc stability at a prosumer price point.
Blue Demon ER4043 Aluminum TIG Rod (3/32″ or 1/8″): ER4043 is the premier filler alloy for automotive casting repairs. It provides superior fluidity and contains silicon, which significantly reduces the risk of hot-cracking as the weld puddle solidifies.
2. Defect Removal and Preparation Tooling
Non-Ferrous (Aluminum Cut) Carbide Burr Set: Never use abrasive grinding discs on aluminum. Standard discs will embed contaminants directly into the soft metal. You must use wide-fluted, non-ferrous carbide burrs on a 1/4″ shank to prevent material clogging.
Milwaukee M12 Cordless Die Grinder: A high-RPM rotary tool is non-negotiable for driving carbide burrs and carving a clean, uniform V-groove down the entire length of the stress fracture.
Magnaflux Spotcheck Dye Penetrant Kit: Hairline structural cracks often propagate further than the naked eye can detect. A non-destructive testing (NDT) dye penetrant kit ensures you locate the absolute terminus of the crack prior to stop-drilling.
3. Thermal Management and Decontamination
Dedicated Stainless Steel Wire Brushes: You must utilize a stainless brush that has never contacted carbon steel. Cross-contamination will instantly destroy an aluminum weld puddle.
Bernzomatic TS8000 High-Intensity Torch: Heavy cast aluminum acts as a massive thermal heat sink. Pre-heating the component is critical for boiling out trapped engine oil and preventing cold-lap during the initial arc strike.
Klein Tools Infrared Laser Thermometer: Precision heat management is the secret to cast aluminum repair. Use an infrared thermometer to verify your casting reaches the optimal pre-heat temperature of 200°F – 300°F (90°C – 150°C).
Step 1: Defect Analysis and Fracture Stop-Drilling
The leading cause of secondary failure in welding repairs is failing to terminate the fracture line. If you strike an arc over a crack without relieving the ends, the extreme thermal stress will cause the crack to continue propagating through the engine block.
Degrease the surface and apply your Magnaflux Dye Penetrant to expose the true microscopic length of the hairline fracture.
Once the absolute ends are identified, drill a stress-relief hole (approximately 1/8 inch or 3mm) at both terminuses. This physical barrier stops the crack from traveling under thermal load.
Step 2: V-Grooving for Structural Penetration
You cannot simply lay a surface weld bead over the top of a crack; structural integrity requires deep root penetration.
Utilize your Die Grinder for TIG welding cast aluminum, Aluminum-Cut Carbide Burr to carve a “V” channel connecting your two stop-drilled holes.
Grind down to approximately 75% of the material’s thickness. If you are repairing a component under hydrostatic pressure (such as an oil pan or transmission casing), achieving 100% root penetration is mandatory.
Step 3: Extreme Chemical Decontamination
Cast aluminum acts like a metallic sponge, absorbing engine oil, transmission fluid, and coolant deep into its granular pores. If you do not decontaminate the V-groove, those hydrocarbons will instantly boil into your argon-shielded puddle, creating severe porosity.
Aggressively brush the V-groove with your Dedicated Stainless Steel Brush.
Flood the area with pure acetone and wipe with a lint-free cloth until it comes away completely pristine. Warning: Never use brake cleaner prior to welding, as UV arc rays convert chlorinated solvents into toxic phosgene gas.
Step 4: Thermal Pre-Heating Strategies
Cold, heavy aluminum dissipates heat incredibly fast, which will pull the welding amperage right out of your puddle, leading to a weak, cold joint.
Use your High-Intensity Torch to preheat the surrounding casting area to exactly 200°F – 300°F, verifying the surface temperature with your Infrared Thermometer.
This thermal management protocol boils out deep-seated moisture and oil. If you observe hydrocarbons sweating out of the pores during pre-heating, immediately wipe the area with acetone and re-brush.
Step 5: AC TIG Welding Parameters and Puddle Control
Dialing in your AC waveform is the deciding factor between a high-tensile fabrication and a contaminated failure.
Machine Parameters: Set your welder to AC (Alternating Current). A professional starting baseline for AC Balance is 65-70% EN (Electrode Negative). This provides the necessary cathodic cleaning action to blast away the aluminum oxide layer while maintaining deep penetration. Set your AC frequency between 100-120 Hz to create a highly focused, stable arc cone.
Puddle Clarification: Initiate the arc and wait for the weld puddle to clarify. You will likely see black soot (impurities) boil to the surface. Allow the AC cleaning action to burn this away before introducing your ER4043 Filler Rod.
Deposition Technique: Feed the filler rod consistently, ensuring you are tying the weld puddle cleanly into both the root and the sidewalls of the V-groove bevel.
Step 6: Controlled Thermal Normalization
Do not quench the repaired casting in water or rapidly cool it with compressed air. Rapid thermal contraction will shock the aluminum and induce heat-affected zone (HAZ) cracking adjacent to your fresh weld. Allow the heavy component to air-cool slowly to room temperature to safely normalize the metallurgical structure.
Aluminium Cylinder Head Rebuild | Aluminium TIG Welding Repair
Executing a structural repair on TIG welding cast aluminum, transmission housings and engine blocks requires surgical cleanliness, precision thermal management, and a deep understanding of AC TIG waveform control. By adhering to these industrial fabrication standards, you can confidently restore highly expensive automotive components.
For more automotive repair tutorials,return to The Mechanic world.
For more advanced automotive diagnostics, custom fabrication tutorials, and heavy-duty repair strategies, subscribe to The Mechanic World on YouTube.
Drop a comment below: What heavy-duty fabrication or automotive repair project is currently sitting in your shop?